


The Heart of Festive Christmas Brownie Decorating Ideas Recipe
When the holidays roll around, nothing warms the kitchen quite like the aroma of freshly baked brownies mingling with festive frosting and colorful decorations. This Festive Christmas Brownie Decorating Ideas Recipe isn’t just about dessert; it’s a joyful experience that invites you to slow down, get creative, and share a sweet moment with those you love.
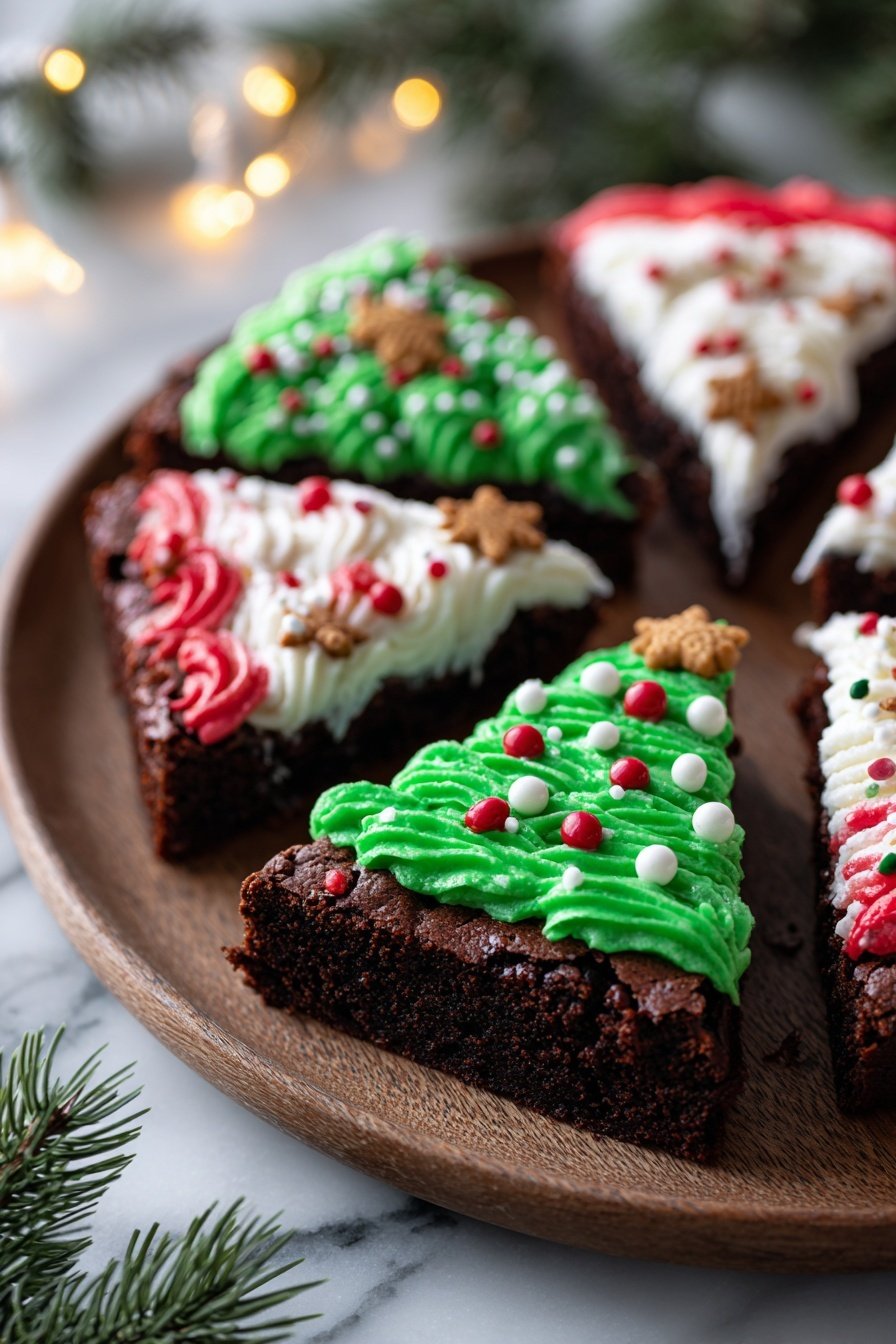
I love how these brownies bring together classic fudgy richness and playful, holiday-themed frosting. You’ll notice the texture is perfectly moist, with crisp-edged triangles that hold up beautifully under thick layers of creamy, piped frosting. It’s a recipe that feels both special and approachable—a centerpiece that shines on any holiday platter.
Whether you’re a seasoned baker or trying your hand at decorating for the first time, you’ll find this Festive Christmas Brownie Decorating Ideas Recipe inspiring and rewarding. The frosting colors pop, the sprinkles add a joyful crunch, and every bite celebrates festive cheer.
Why This Recipe Shines
- Flavor balance: Cozy, bright, and layered — never flat.
- Beginner tested: Clear steps with real-life timing cues.
- Customize-friendly: Works with pantry swaps and add-ins.
- Make ahead approved: Holds texture and flavor beautifully.
Ingredient Breakdown
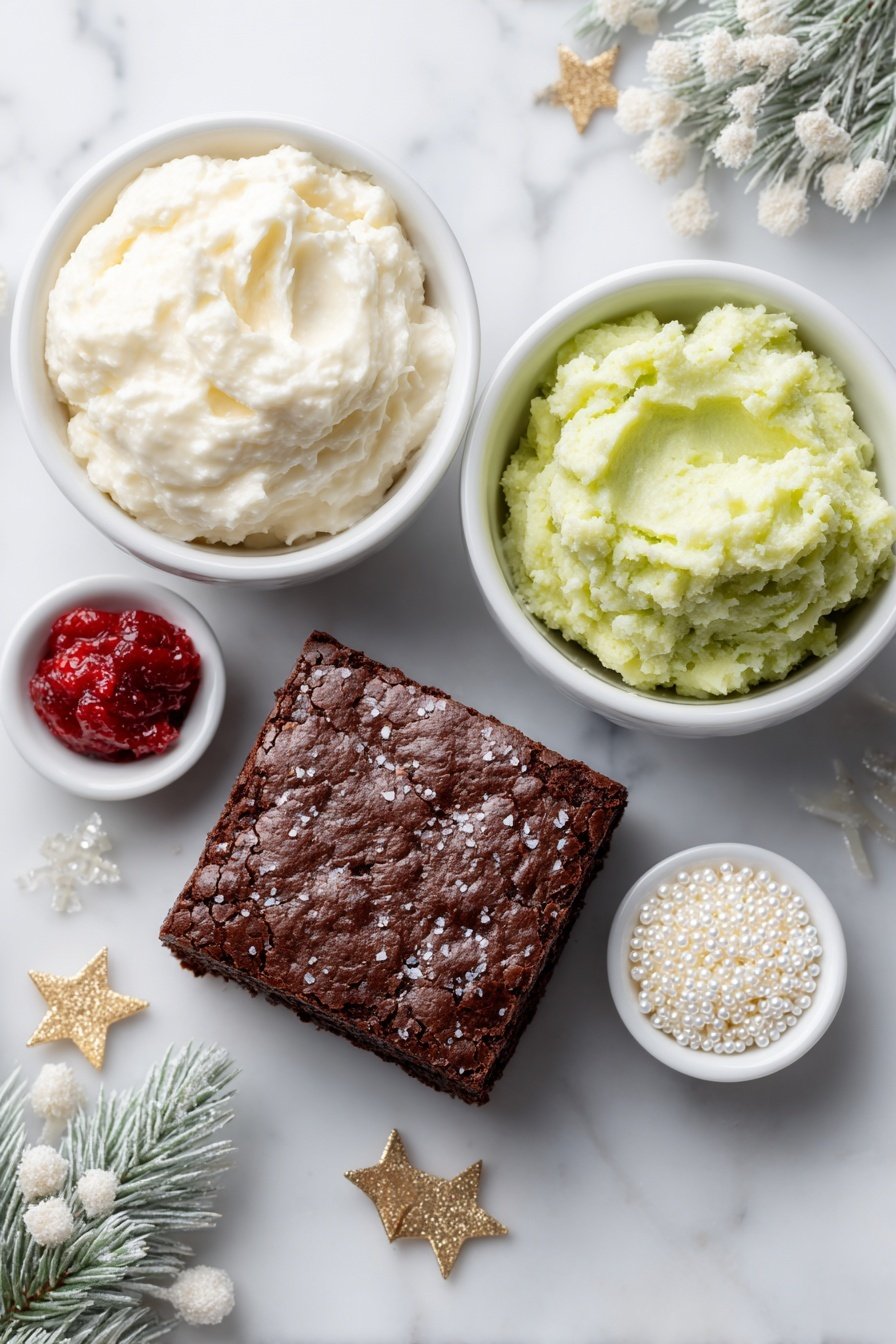
- Brownie Mix or Homemade Brownie Batter: The base of fudgy, chocolatey goodness. Swap for your favorite from-scratch recipe if you prefer fresh ingredients and custom flavors.
- White Frosting: Creamy canvas for decorating. You can use store-bought for convenience or whip homemade buttercream for richer taste.
- Edible Gel Food Coloring (Red and Green): Adds vibrant holiday hues. If you prefer natural, try beet juice powder or spinach powder mixed into frosting.
- Edible Gold Stars and White Pearl Sprinkles: Small touches that create festive sparkle and texture. Feel free to substitute with crushed candy canes or colored sugar crystals.
- Icing Bags and Large Star Tip: Essential for beautiful, defined piping shapes. If unavailable, a zip-top bag with a snipped corner can work for beginner decorating.
Before You Begin
Start by gathering all your ingredients and tools so you’re not scrambling mid-bake. Preheat your oven according to the brownie mix instructions, usually around 350°F (175°C). Greasing the pan well ensures your brownies release cleanly after baking. Prep your frosting colors and decorations once the brownies have cooled—that way, everything flows smoothly without rushing.
What You’ll Need
Essential tools to make Festive Christmas Brownie Decorating Ideas Recipe easy and enjoyable — plus optional upgrades if you love efficiency.
How to Make Festive Christmas Brownie Decorating Ideas Recipe
- Preheat your oven following the brownie mix packaging instructions. A 9-inch springform pan works wonderfully here and heavy greasing with nonstick spray ensures the brownies won’t stick.
- Mix the two boxes of brownie mix as directed—or prepare your favorite double batch homemade recipe. You’ll want a thick, shiny batter that’s silky and smooth as it pours.
- Pour the batter evenly into the greased pan, smoothing the surface gently for even baking. Expect a longer bake time due to extra thickness—start checking for doneness around 35 minutes, looking for a toothpick that comes out with just a few moist crumbs attached.
- Cool completely in the pan before removing. Warm brownies won’t hold frosting well, and letting them cool ensures every slice stays neat with crisp edges.
- Release the sides of the springform pan, transfer your firm brownies to a cutting board, and cut into 8 even triangles—perfect for holiday shapes like stars and trees.
- Prepare your frosting colors next: divide white frosting into three bowls, tint one with red gel coloring and another with green. Stir gently to keep frosting light and fluffy—your frosting should hold peaks for sharp piping edges.
- Fill icing bags with the colored frostings, fitting each with a large star tip. This tip is key for creating those crisp, beautiful swirls and shapes that look so festive.
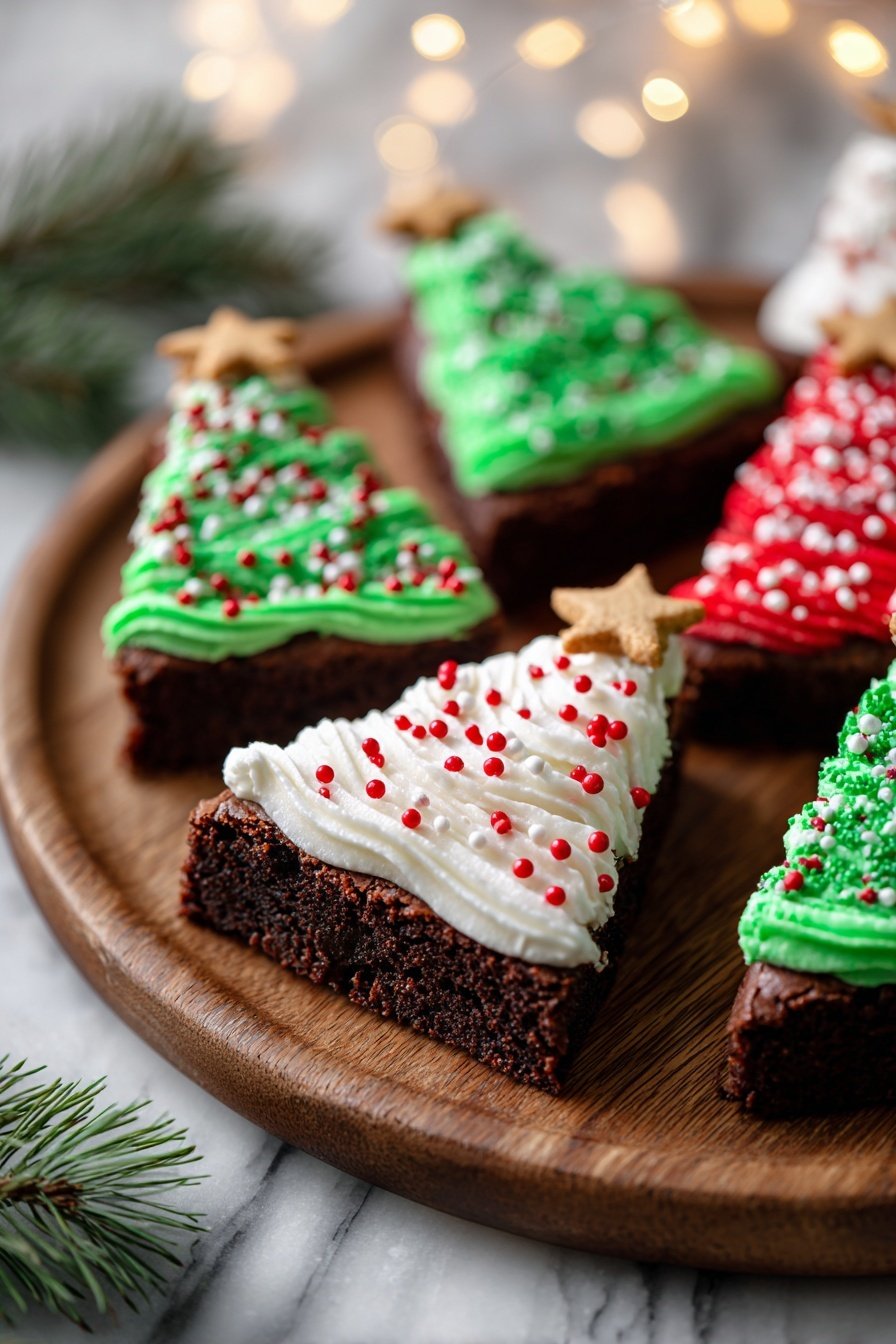
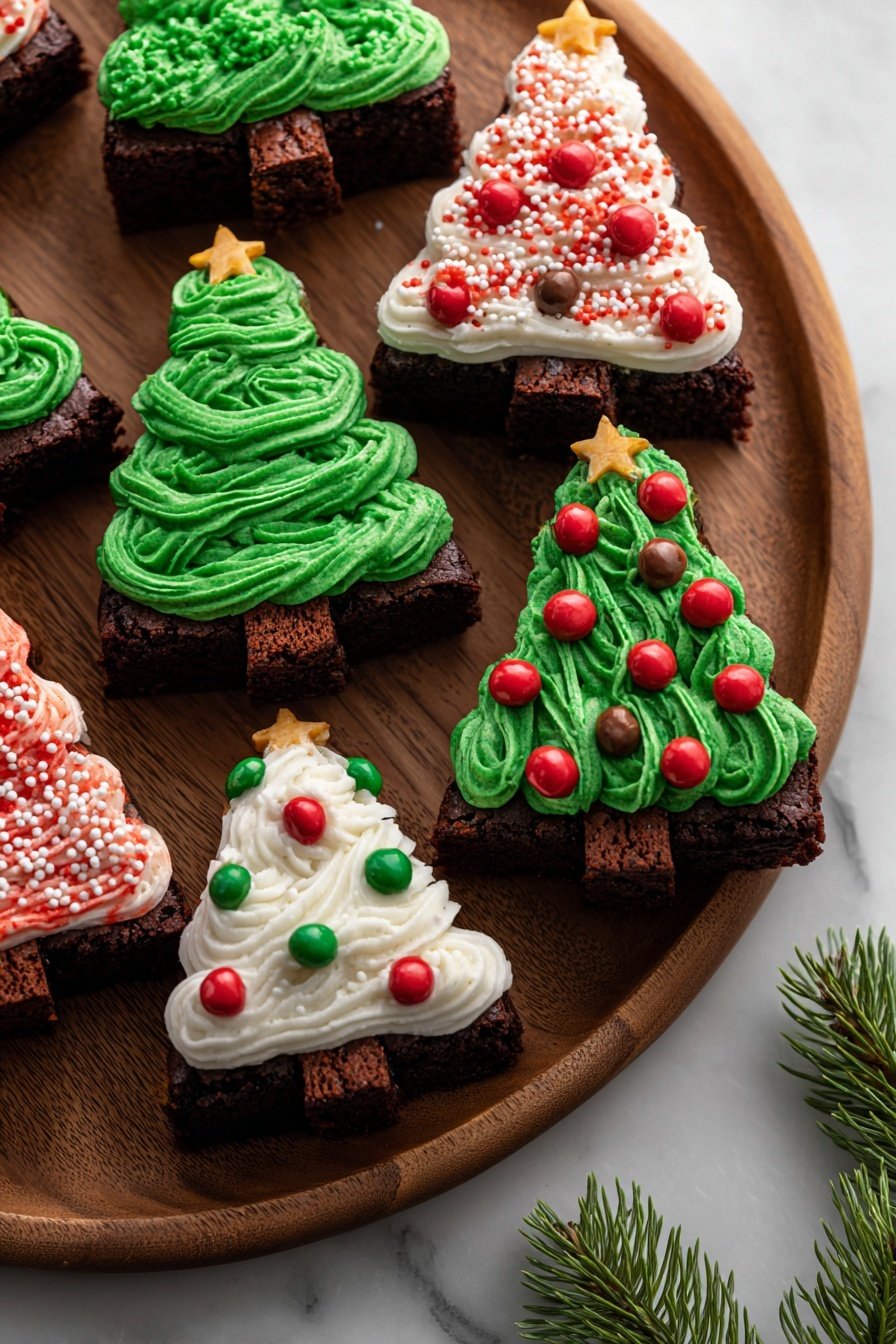
- Decorate by piping green frosting onto tree-shaped brownie triangles, then sprinkle with pearl decorations and edible gold stars for that magical sparkle. For Santa hats, alternate red and white swirls for the classic look, adding white dots for fluffy trim.
- Arrange your decorated brownies on a festive platter. The bright colors pop against the deep chocolate base, and you’ll love how easy it is to create a statement dessert that feels joyful and inviting.
Pro-Level Pointers
Texture cues, timing tricks, and flavor boosters — the tiny details that make your Festive Christmas Brownie Decorating Ideas Recipe taste restaurant-worthy.
- Check brownie doneness by inserting a toothpick near the center; expect moist crumbs but avoid wet batter for fudgy, not gooey, results.
- Keep your frosting cool but soft enough to pipe easily—warm frosting can lose shape, so chill briefly if needed.
- Try adding a pinch of cinnamon or espresso powder to your brownie batter for warm spice notes that boost chocolate depth subtly.
- Plan for frosting prep during brownie cooling—this prevents rushed decorating and keeps the texture silky and smooth.
Creative Variations for Festive Christmas Brownie Decorating Ideas Recipe
- Mint Twist: Add peppermint extract to your frosting and top with crushed candy canes for a refreshing crunch.
- Nutty Delight: Mix chopped toasted pecans or walnuts into your brownie batter for added texture and savory balance.
- Snowy White: Use coconut flakes sprinkled atop white frosting for a snowy effect perfect for winter themes.
- Chocolate Drizzle: After frosting, drizzle melted dark chocolate for a luscious, glossy finish.
- Personalized Messages: Use contrasting frosting to pipe names or festive greetings, great for gifting or parties.
Storage, Freezing & Reheating
- Room Temperature: Store brownies in an airtight container for up to 3 days. The frosting will stay silky but may soften slightly.
- Refrigeration: Keeps brownies fresh up to a week but may firm the frosting — allow to soften at room temp before serving.
- Freezing: Wrap individual frosted brownies in plastic wrap and freeze for up to 2 months. Thaw overnight in the fridge, then bring to room temperature for best texture.
- Reheating: Gently warm unfrosted or partially frosted brownies in the microwave for 10-15 seconds to revive fudginess without melting decorations.
Festive Christmas Brownie Decorating Ideas Recipe FAQs
- Can I make these brownies gluten-free? Yes! Use a gluten-free brownie mix or homemade recipe, ensuring frosting and decorations are gluten-free too.
- What if I don’t have icing bags or star tips? No worries—use a resealable plastic bag with a tiny cut in one corner for piping, or spread frosting with a knife for a rustic look.
- How do I avoid cupcake sogginess with the frosting? Make sure brownies are completely cool before frosting, and pipe frosting rather than spreading to prevent melting.
- Can I prep these ahead of time? Definitely! Bake brownies a day in advance and frost close to serving time for freshest presentation.
- Are there natural food coloring options? Yes — beet or pomegranate juices for red, spinach or matcha powder for green work beautifully without artificial dyes.
Festive Christmas Brownie Decorating Ideas Recipe

Celebrate the holiday season with these festive Frosted Christmas Brownies featuring a rich, fudgy brownie base topped with vibrant red, green, and white star-shaped frosting. Decorated with edible gold stars and white pearl sprinkles, these delightful treats make an eye-catching party platter perfect for Christmas gatherings.
- Prep Time: 20 minutes
- Cook Time: 40 minutes
- Total Time: 60 minutes
- Yield: 8 brownies
- Category: Dessert
- Method: Baking
- Cuisine: American
Ingredients
Brownie Base
- 2 boxes brownie mix (approx. 2 x 18 oz each) or double batch homemade brownies
Frosting and Decorations
- 1 to 3 jars white frosting (16 oz per jar)
- Edible gel food coloring (red and green), or natural alternative
- Edible gold star decorations
- White pearl sprinkles
- Icing bags
- Large star frosting tip (such as 1M)
Instructions
- Prepare the Pan: Preheat the oven according to the brownie mix packaging instructions. Lightly grease a 9 inch springform pan with nonstick spray to prevent the brownies from sticking.
- Make the Brownie Batter: Combine both boxes of brownie mix following package instructions or prepare a double batch of your preferred homemade brownie recipe. Pour the batter evenly into the prepared pan.
- Bake the Brownies: Bake according to the instructions on the brownie mix packages, or until a toothpick inserted in the center comes out clean. Note that baking time may be longer due to the thickness; check for doneness accordingly, typically around 40 minutes.
- Cool and Cut: Allow the brownies to cool completely in the pan. Once cooled, release from the springform pan and transfer to a cutting board. Cut into 8 even triangles to create festive shapes.
- Prepare Colored Frostings: In separate small bowls, mix white frosting with red food coloring in one bowl and green food coloring in another until desired shades are achieved. Leave some frosting white for variation.
- Fill Icing Bags: Transfer the red, green, and remaining white frostings into separate icing bags fitted with a large star tip (such as 1M) for decorating.
- Decorate Brownies: Pipe green frosting onto brownies designated as Christmas tree shapes, decorating them with white pearl sprinkles and edible gold star decorations to mimic ornaments and tree toppers. For Santa hat designs, alternate piping with red and white frosting for the classic festive look.
- Serve: Arrange the decorated brownies on a platter for a festive presentation and serve at your holiday gatherings.
Notes
- The baking time may vary depending on your oven and thickness of the brownies; always check doneness with a toothpick.
- Use natural food coloring alternatives if preferred to avoid artificial dyes.
- Allow brownies to cool completely before frosting to prevent melting and sliding of decorations.
- Store leftover brownies in an airtight container at room temperature for up to 3 days or refrigerate for up to a week.


